Navigating
Getting used to Blender takes time. Quite a lot of time. There’s no time like the present.
There are two main things you need to know how to navigate: the UI, and the viewport.
Viewport
Navigating the viewport quickly becomes as natural as moving your head around an object, it is a learned skill.
The basic movements are Pan, Rotate, and Zoom. With these you can navigate any 3D environment in any program.
Click down middle mouse button and move your mouse to rotate the view. This rotates it around a pivot point, you cannot see this pivot point, only feel it out by rotating and zooming.
Zoom in and out by scrolling, this brings you closer and further from your view pivot point.
Pan by pressing Shift + middle mouse button and move around. This is the main way to move your view pivot point around.
Another great way of navigating the viewport is to use Alt + middle mouse button to center your view on where you click. This is not available with middle mouse emulation unless you change the modifier key that emulates it.
Object Mode
Currently, assuming you haven’t changed anything from opening the program, you are in Object Mode.
You are also in the Layout workspace.
You can tell which workspace you are in with the tab at the top of the screen.
You can tell which mode of the 3D viewport you are in with the drop-down in the top left of the Layout workspace.

In Object Mode you can arrange the various objects of your project. In the default project that means the camera, light, and default Blender cube.
Select the cube by clicking it.
Tools
In Object Mode you have a few basic tools:

For now, focus on the first tool and the second section of tools.
Hover above each of their tools and take note of their keybinds, keybinds are very important in Blender.
The first tool has 4 variations. The main one you’ll need is Select Box. You can switch its variations, or switch back to this tool, with W.
In the second section of tools remains the bread and butter of Blender:
- Move - G (G for Grab)
- Rotate - R
- Scale - S
Transform also exists, it’s just a way of visually seeing all of them at once.
Rotate, scale, move, and mess around with the cube! Try and get a solid feeling for these tools, these keybinds are almost universal to every aspect of Blender.
Axis Lock
The final core aspect of viewport navigation is locking to the axes.
Say I wanted to move this cube along the X axis (the red line), and keep it exactly on that axis.

If I press G and move it along the red line, it’s like it’s panning the camera, it does not stick to the X axis.

It is easier to see this effect from another angle, for example, above:

If I wish to move it locked to the X axis I can press X while moving it:

You can see it easier from above again:

You can use the keybinds X, Y, or Z while moving, scaling, or rotating any object to lock them to the axis.
- X is the red horizontal line.
- Y is the green horizontal line.
- Z is a blue vertical line.
You can see their positive direction with the move tool:

Building Familiarity
You can see the camera’s point of view by pressing numpad 0 or the camera icon along the right side of the viewport.
- Scale the cube along one axis.
- Rotate the rectangular prism along one axis at a time until it’s facing the same angle as the camera.
- Move the rectangular prism away from the camera, but still within where it can see.
UI
Blender’s UI is a whole beast of its own.
Let’s start with just clearing some things up so you know what’s possible first. Each tool has a hundred different uses for specific scenarios, and it’s unlikely you’ll need the vast majority of available options right now.
Blender’s docs provide a good image for the areas of the default Layout workspace:
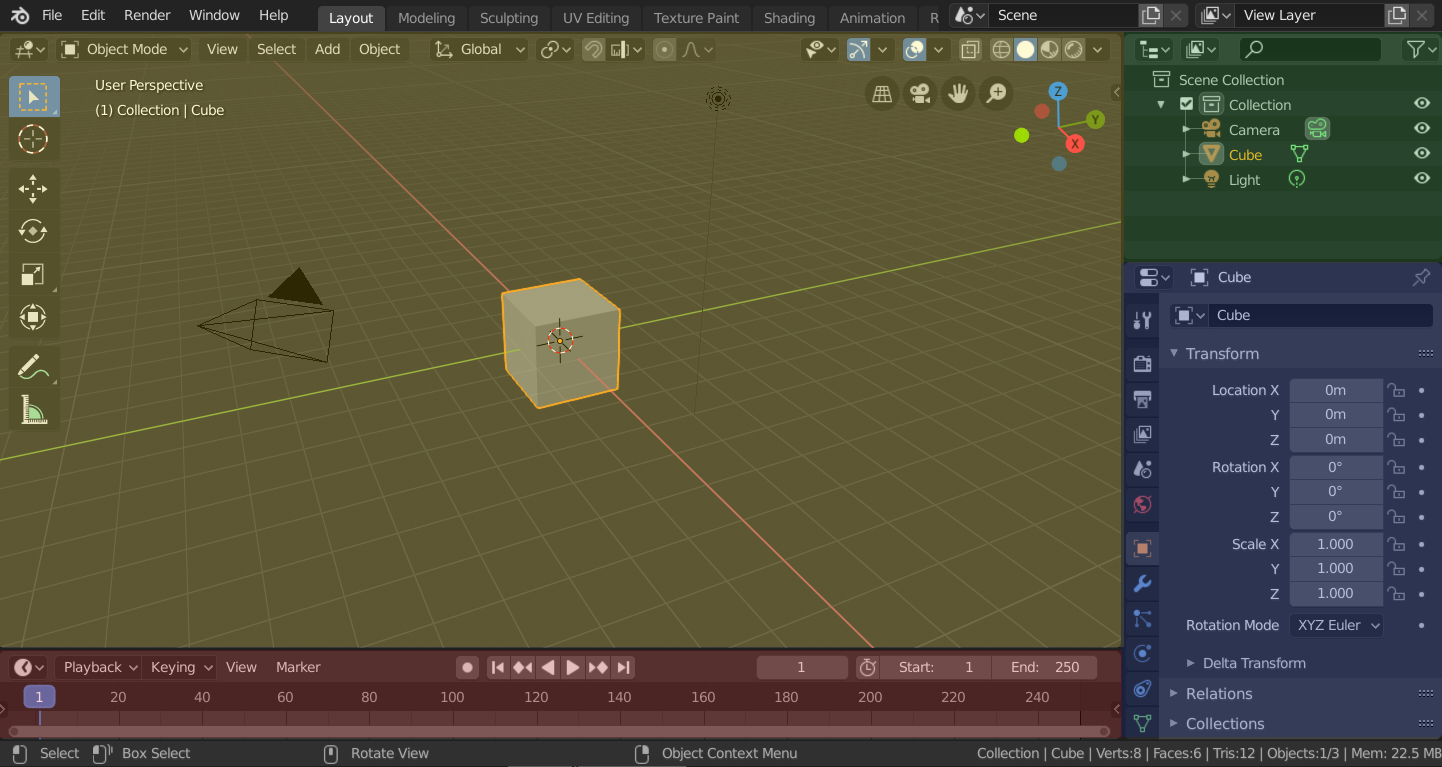
Layout’s layout
Here’s the laydown of the Layout workspace’s areas.
At the bottom of the screen you have an area which can be switched to one of many different tools. By default, it is a timeline for animation.
You can change what panel it is with the icon in the top left.

At the very bottom left you can see what your mouse buttons do at this point in time.

At the bottom right you can find the properties area. This contains numerous panels which you can read about here, if you so desire. They generally contain options for currently selected things. The first panel, for example, has settings for your currently selected tool.

Last, but not least, is the outliner. This is simply the layout of your whole scene and all objects within it.

Building familiarity
- Change what the panel at the bottom of the screen shows.
- Press the modifier keys Alt, Shift, Ctrl/Cmd and see how the bottom-left mouse binds change.
- Select the light, the camera, or the cube in your scene with the outliner. See how the properties area adds and removed tabs for each type of object.